Cài đặt Canvas LMS trên Ubuntu 22.04
Cài đặt Canvas LMS trên Ubuntu 22.04
I./ Các thành phần trên bản cài đặt Opensource Canvas LMS
Để cài đặt Canvas LMS trên cloud, bạn cần đảm bảo các thành phần và yêu cầu sau đây. Canvas LMS chủ yếu được xây dựng bằng Ruby on Rails và sử dụng PostgreSQL làm cơ sở dữ liệu.
1. Các thành phần chính cần thiết
Phần cứng hoặc Cloud Server:
- Máy chủ Cloud: CloudX cung cấp Cloud – VPS tốc độ cao, chi phí thấp.
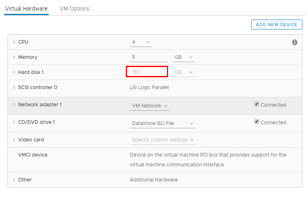
- Cấu hình khuyến nghị (cho môi trường sản xuất):
- CPU: 4+ lõi
- RAM: 8 GB trở lên
- Dung lượng ổ đĩa: SSD 200+ GB (tùy thuộc vào số lượng dữ liệu học tập)
Hệ điều hành:
- Ubuntu 22.04 LTS (khuyến nghị) hoặc CentOS 7/8 ít khuyến nghị hơn
Phần mềm cần thiết:
- Web Server:
- Nginx hoặc Apache (Canvas khuyến nghị Nginx).
- Database:
- PostgreSQL (phiên bản >= 12).
- Redis:
- Để xử lý hàng đợi và lưu trữ bộ nhớ tạm.
- Ruby:
- Phiên bản 2.7 trở lên (Canvas LMS hiện khuyến nghị Ruby 3.1.x).
- Node.js:
- Phiên bản LTS (Canvas sử dụng Node.js để biên dịch tài nguyên JavaScript).
- Bundler và Yarn:
- Quản lý các gói Ruby và JavaScript.
- Git:
- Để tải xuống mã nguồn Canvas LMS.
Dịch vụ bổ sung:
- SMTP Server:
- Để gửi email xác nhận, thông báo, v.v. (Gmail, Amazon SES, SendGrid,...).
- Domain Name:
- Một tên miền riêng (ví dụ:
lms.yoursite.com) và cấu hình DNS.
- Một tên miền riêng (ví dụ:
2. Các yêu cầu cụ thể
Yêu cầu phần mềm:
- Canvas LMS yêu cầu phiên bản PostgreSQL >= 12 và Redis:
- Đảm bảo cấu hình tối ưu Redis để xử lý hàng đợi công việc.
- Yêu cầu Ruby:
- Canvas yêu cầu Ruby >= 2.7 và khuyến khích sử dụng phiên bản Ruby 3.x.
Tài nguyên:
- Nếu bạn phục vụ 50-100 người dùng đồng thời, yêu cầu như sau:
- CPU: 4 lõi
- RAM: 8-16 GB
- SSD: 100 GB (cho dữ liệu, tài liệu và file tải lên)
II./ Chi tiết cài đặt Canvas LMS trên Ubuntu 22.04 LTS
Đối với hướng dẫn này, chúng tôi sẽ sử dụng Cloud với Ubuntu 22.04 LTS 64 bit . Máy chủ có 8GB RAM và 4 lõi CPU. Nó đáp ứng các yêu cầu phần cứng tối thiểu cho Canvas LMS nguồn mở. Chúng tôi không khuyến nghị cài đặt Canvas trên phần cứng có thông số kỹ thuật thấp hơn vì quá trình cài đặt có thể không thành công. Chúng tôi cũng không khuyến nghị sử dụng hệ điều hành nào khác ngoài Ubuntu. Cài đặt Canvas LMS trên Windows không được hỗ trợ.
Trước khi bắt đầu cài đặt, hãy xem dịch vụ lưu trữ Canvas LMS của chúng tôi . Dịch vụ này cung cấp máy chủ đám mây được quản lý với Canvas LMS mã nguồn mở được cài đặt sẵn. Bạn có thể bắt đầu sử dụng LMS mà không cần phải thiết lập và quản lý máy chủ riêng.
Các bước cài đặt Canvas LMS
Cập nhật hệ thống
Trước hết chúng ta nên cập nhật máy chủ và các gói lên phiên bản mới nhất.
# sudo apt update && apt upgrade -y
Install PostgreSQL database server
Tiếp theo chúng ta cài đặt và cấu hình máy chủ cơ sở dữ liệu PostgreSQL . Khi tôi viết bài viết này, postgresql-14 đã có, có thể cài đặt bản cao hơn.
# sudo apt-get install postgresql-14
Add postgresql database and a database user for Canvas. You will be asked to set a password for canvas database user.
# sudo -u postgres createuser canvas --no-createdb \
--no-superuser --no-createrole --pwprompt
# sudo -u postgres createdb canvas_production --owner=canvas
Download Canvas code to the server
We will use Git to get Canvas code. Install Git if you don’t have it already.
# sudo apt install git-core
Ở bước này, chúng ta sẽ tạo một người dùng hệ thống riêng cho ứng dụng Canvas LMS. Chúng ta sẽ tải xuống mã Canvas và cài đặt nó dưới tài khoản này.
# useradd --create-home -s /bin/bash canvas
# chmod 711 /home/canvas
# su - canvas
Clone files from Canvas Github repository into public_html folder.
$ git clone https://github.com/instructure/canvas-lms.git /home/canvas/public_html
$ cd /home/canvas/public_html
$ git checkout prod
Install Canvas LMS dependencies
Chuyển lại từ người dùng “canvas” sang người dùng sudo và cài đặt ruby, Node.js, Bundler, Yarn và các phụ thuộc khác của Canvas LMS.
$ sudo apt-get install software-properties-common
$ sudo add-apt-repository ppa:instructure/ruby
$ sudo apt-get update
Cài đặt Ruby 3.1
$ sudo apt-get install ruby3.1 ruby3.1-dev zlib1g-dev libxml2-dev \
libsqlite3-dev postgresql libpq-dev \
libxmlsec1-dev libidn11-dev curl make g++
Cài đặt Node.js
$ curl -sL https://deb.nodesource.com/setup_16.x | sudo -E bash -
$ sudo apt-get install nodejs
$ sudo npm install -g npm@latest
Cài đặt Bundler và Ruby Gems
# sudo gem install bundler --version 2.3.26
# su - canvas
$ cd /home/canvas/public_html
$ bundle config set --local path vendor/bundle
$ bundle install
Install Yarn
# sudo npm -g install yarn
Install NodeJS dependencies
# su - canvas
$ cd /home/canvas/public_html
$ yarn install
Cấu hình Canvas LMS
Sao chép các tệp cấu hình mặc định của Canvas:
$ cd /home/canvas/public_html
$ for config in amazon_s3 database \
delayed_jobs domain file_store outgoing_mail security external_migration; \
do cp config/$config.yml.example config/$config.yml; done
Edit configuration files and enter relevant database settings, domain settings, outgoing mail server settings etc.
$ cp config/dynamic_settings.yml.example config/dynamic_settings.yml
$ vim config/dynamic_settings.yml
$ cp config/database.yml.example config/database.yml
$ vim config/database.yml
$ cp config/outgoing_mail.yml.example config/outgoing_mail.yml
$ vim config/outgoing_mail.yml
$ cp config/domain.yml.example config/domain.yml
$ vim config/domain.yml
$ cp config/security.yml.example config/security.yml
$ vim config/security.yml
Populate Canvas database
Run db:initial_setup to create database tables and populate database with initial data. On this step you will be asked to create Canvas administrator user.
$ mv db/migrate/20210823222355_change_immersive_reader_allowed_on_to_on.rb .
$ mv db/migrate/20210812210129_add_singleton_column.rb db/migrate/20111111214311_add_singleton_column.rb
$ yarn gulp rev
$ RAILS_ENV=production bundle exec rake db:initial_setup
$ mv 20210823222355_change_immersive_reader_allowed_on_to_on.rb db/migrate/.
$ RAILS_ENV=production bundle exec rake db:migrate
Generate Assets
Run canvas:compile_assets to generate template files.
$ mkdir -p log tmp/pids public/assets app/stylesheets/brandable_css_brands
$ touch app/stylesheets/_brandable_variables_defaults_autogenerated.scss
$ touch Gemfile.lock
$ touch log/production.log
$ RAILS_ENV=production bundle exec rake canvas:compile_assets
Cài đặt máy chủ web Apache và Passenger
Tiếp theo chúng ta cần một máy chủ web để phục vụ Canvas. Nginx và Apache là những lựa chọn phổ biến nhất. Chúng ta sẽ cài đặt Apache + Passenger cho hướng dẫn này.
$ sudo apt-get install apache2
# Cài đặt khóa PGP của chúng tôi và thêm hỗ trợ HTTPS cho APT
sudo apt-get install -y dirmngr gnupg apt-transport-https ca-certificates curl
curl https://oss-binaries.phusionpassenger.com/auto-software-signing-gpg-key.txt | gpg --dearmor | sudo tee /etc/apt/trusted.gpg.d/phusion.gpg >/dev/null
# Add our APT repository
sudo sh -c 'echo deb https://oss-binaries.phusionpassenger.com/apt/passenger jammy main > /etc/apt/sources.list.d/passenger.list'
sudo apt-get update
# Install Passenger + Apache module
sudo apt-get install -y libapache2-mod-passenger
Enable the Passenger Apache module and restart Apache.
sudo a2enmod passenger
sudo apache2ctl restart
Validate libapache2-mod-passenger the installation. Run commands below to make sure that the passenger and libapache2-mod-passenger module are installed correctly.
sudo /usr/bin/passenger-config validate-install
sudo /usr/sbin/passenger-memory-stats
Ngoài ra hãy bật mod_rewrite và mod_ssl cho apache.
$ sudo a2enmod rewrite
$ sudo a2enmod ssl
Cấu hình Canvas VirtualHost trong Apache
Disable default Apache virtualhost configuration file and create a virtualhost configuration file for the canvas application.
$ sudo unlink /etc/apache2/sites-enabled/000-default.conf
$ sudo vim /etc/apache2/sites-available/canvas.conf
Copy configuration below into Canvas virtualhost configuration file. Replace ServerName, ServerAlias, ServerAdmin, DocumentRoot and other settings to match your domain name and app location.
ServerName canvas-test.webhostingzone.org
ServerAlias canvasfiles-test.webhostingzone.org
ServerAdmin [email protected]
DocumentRoot /home/canvas/public_html/public
RewriteEngine On
RewriteCond %{HTTP:X-Forwarded-Proto} !=https
RewriteCond %{REQUEST_URI} !^/health_check
RewriteRule (.*) https://%{HTTP_HOST}%{REQUEST_URI} [L]
ErrorLog /var/log/apache2/canvas_errors.log
LogLevel warn
CustomLog /var/log/apache2/canvas_access.log combined
PassengerPreloadBundler on
SetEnv RAILS_ENV production
Options All
AllowOverride All
Require all granted
# If you are only serving HTTP behind a HTTPS-terminating load balancer, skip the next VirtualHost
ServerName canvas-test.webhostingzone.org
ServerAlias canvasfiles-test.webhostingzone.org
ServerAdmin [email protected]
DocumentRoot /home/canvas/public_html/public
ErrorLog /var/log/apache2/canvas_errors.log
LogLevel warn
CustomLog /var/log/apache2/canvas_ssl_access.log combined
SSLEngine on
BrowserMatch "MSIE [17-9]" ssl-unclean-shutdown
# the following ssl certificate files are generated for you from the ssl-cert package.
SSLCertificateFile /etc/ssl/certs/ssl-cert-snakeoil.pem
SSLCertificateKeyFile /etc/ssl/private/ssl-cert-snakeoil.key
PassengerPreloadBundler on
SetEnv RAILS_ENV production
Options All
AllowOverride All
Require all granted
Enable Canvas virtual host
$ sudo a2ensite canvas
$ systemctl reload apache2
Tại thời điểm này, bạn có thể truy cập Canvas qua trình duyệt. Mở trình duyệt và nhập tên miền đã chỉ định trong ServerName . Trang đăng nhập mặc định của Canvas sẽ xuất hiện.

Hoàn tất cài đặt Canvas LMS
Các bước thiết lập Canvas tiếp theo
Nếu trang đăng nhập Canvas được tải trong trình duyệt thì đây là một dấu hiệu tốt. Nhưng chúng ta cần hoàn thành thêm một vài điều chỉnh nữa để hệ thống quản lý học tập Canvas nguồn mở sẵn sàng cho sản xuất.
Cài đặt chứng chỉ SSL cho Canvas
Khi tên miền Canvas hoặc tên miền phụ được trỏ đến địa chỉ IP của máy chủ, chúng ta có thể tiến hành và cài đặt chứng chỉ SSL cho ứng dụng Canvas LMS. Đối với hướng dẫn này, chúng ta sẽ cài đặt chứng chỉ SSL LetsEncrypt miễn phí .
Thực hiện các hướng dẫn sau trên dòng lệnh trên máy để đảm bảo rằng bạn có phiên bản mới nhất của snapd .
sudo snap install core; sudo snap refresh core
Remove certbot-auto and any Certbot OS packages
sudo apt-get remove certbot
Install Certbot
sudo snap install --classic certbot
sudo ln -s /snap/bin/certbot /usr/bin/certbot
Install SSL certificate for Canvas using certbot
sudo certbot --apache
Khi chứng chỉ SSL được cài đặt đúng cách, bạn sẽ thấy biểu tượng ổ khóa và dòng chữ “Kết nối an toàn” trong trình duyệt khi truy cập Canvas URI.

Chứng chỉ SSL cho Canvas đã được cài đặt
Cài đặt máy chủ bộ nhớ đệm Redis
Redis cache server là một ý tưởng hay để tối ưu hóa hiệu suất Canvas. Yêu cầu Redis phiên bản 2.6.x trở lên. Thêm kho lưu trữ PPA và cài đặt Redis .
sysadmin@appserver:/var/canvas$ sudo add-apt-repository ppa:chris-lea/redis-server
sysadmin@appserver:/var/canvas$ sudo apt-get update
sysadmin@appserver:/var/canvas$ sudo apt-get install redis-server
Tiếp theo quay lại thư mục mã Canvas và chỉnh sửa các tệp cấu hình redis .
vim config/cache_store.yml
Thêm các dòng bên dưới vào tệp:
test:
cache_store: redis_cache_store
development:
cache_store: redis_cache_store
production:
cache_store: redis_cache_store
Bây giờ hãy chỉnh sửa file redis.yml và đặt đường dẫn đến máy chủ redis tại đó.
vim config/redis.yml
Nếu Redis được cài đặt trên cùng một máy chủ với Canvas thì cấu hình của bạn sẽ giống như thế này. Thay thế localhost bằng IP máy chủ redis nếu bạn đã cài đặt redis trên máy chủ bên ngoài.
production:
servers:
- redis://localhost
Lưu tệp cấu hình và khởi động lại Canvas để áp dụng thay đổi.
Cài đặt QTIMigrationTool cho Canvas
Setup Canvas Automated jobs
Canvas automated jobs should be running in order to generate reports, send emails etc. Next commands will configure and start Canvas delayed jobs.
canvas$ sudo ln -s /home/canvas/public_html/script/canvas_init /etc/init.d/canvas_init
canvas$ sudo update-rc.d canvas_init defaults
canvas$ sudo /etc/init.d/canvas_init start
Cài đặt RCE API cho Rich Content Editor
Xử lý sự cố lỗi cài đặt Canvas
1. Ứng dụng gặp lỗi sau: Bạn đã kích hoạt strscan 3.0.1, nhưng Gemfile của bạn yêu cầu strscan 3.0.6. Vì strscan là gem mặc định, bạn có thể xóa sự phụ thuộc của mình vào nó hoặc thử cập nhật lên phiên bản bundler mới hơn hỗ trợ strscan làm gem mặc định. (Gem:: LoadError )
Giải pháp: preload Bundler with "PassengerPreloadBundler on" Apache configuration option
2. Common errors during compile assets: FrozenError: can’t modify frozen Array
Solution: delete Canvas project folder, download files from Github again and repeat installation steps.
Tham khảo
- Canvas Production Start – https://github.com/instructure/canvas-lms/wiki/Production-Start
- Cài đặt Passenger – https://www.phusionpassenger.com/docs/advanced_guides/install_and_upgrade/apache/install/oss/jammy.html
- CloudX – https://canvaslms.cloudx.com.vn
- Cài đặt Canvas RCE - https://github.com/instructure/canvas-rce-api
Trên đây là chia sẻ về Cài đặt Canvas LMS trên Ubuntu 22.04.
Trong quá trình thực hiện, nếu gặp bất kỳ khó khăn nào, bạn vui lòng liên hệ các kỹ thuật viên của CloudX để được nhanh chóng hỗ trợ.! Nếu thấy bài viết này hữu ích hãy subscribe để theo dõi những thông tin mới nhất từ CloudX nhé. Chúc các bạn thành công!
Hệ sinh thái của CloudX:
- Tư vấn miễn phí hệ thống CNTT cho doanh nghiệp
- Miễn phí đăng ký dùng thử Cloud Server, Cloud VPS, Hosting (lưu trữ website, phần mềm, xử lý dữ liệu)
- Xmail - Email tên miền doanh nghiệp
- Server vật lý, cho thuê chỗ đặt Server tại các Datacenter hàng đầu Việt Nam
- Dịch vụ quản trị máy chủ, Outsource CNTT, quản trị hệ thống mạng doanh nghiệp, IT Support
- Miễn phí cài đặt, vận hành quản trị phần mềm trường học ảo E-Learning Canvas LMS (được đánh giá LMS E-Learning tốt nhất thế giới)
- Triển khai, quản trị Firewall cho doanh nghiệp
- Các giải pháp về Monitor, Alert Cảnh báo, Sao lưu - Backup dữ liệu từ xa cho máy chủ, Cloud, VPS.
- Thiết kế website chuyên nghiệp
Xin vui lòng liên hệ Hotline/Zalo: 0983.357.585 để được tư vấn tận tình
TIN MỚI NHẤT
BÀI VIẾT CÙNG CHUYÊN MỤC
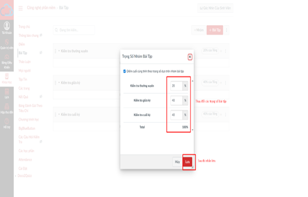
HƯỚNG DẪN THIẾT LẬP TRỌNG SỐ VÀ THÊM BÀI TẬP TRÊN ...
HƯỚNG DẪN THIẾT LẬP TRỌNG SỐ VÀ THÊM BÀI TẬP TRÊN CANVAS LMS

Hướng dẫn gắn phòng học trực tuyến Zoom, Google Meet ...
Hướng dẫn gắn phòng học trực tuyến Zoom, Google Meet vào Canvas LMS
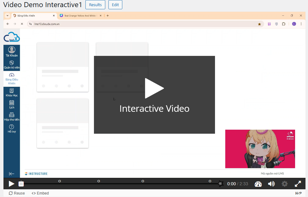
Hướng dẫn sử dụng H5P - ví dụ tạo video tương tác H5P
Hướng dẫn sử dụng H5P - ví dụ tạo video tương tác H5P

Canvas LMS và Moodle: So sánh để lựa chọn nền tảng ...
Canvas LMS và Moodle: So sánh để lựa chọn nền tảng eLearning bền vững cho giáo ...

BÁO CÁO KHUYẾN NGHỊ BẢO MẬT pfSense 2025
BÁO CÁO KHUYẾN NGHỊ BẢO MẬT pfSense 2025
Extend dung lượng cho ổ đĩa Vmware, Cấu hình LVM trên ...
Extend dung lượng cho ổ đĩa Vmware, Cấu hình LVM trên linux trên cùng 1 ổ đĩa